Hi @a2retro,
Thanks for posting - nice pictures! Love the contrast
For the viewers at home, I decided to print a portion of the file that @a2retro submitted. Here is the link
Actually - not quite. It looks like that in the video, but it's a bit more complicated.
Imagine you had a thin 10mm long trace along the X axis. To print it, the nozzle will come down on one side, (X=0) rotate the gear forward to apply pressure, and then move in X until it reaches the end of a trace (X=10). When it reaches the end, the printer will rotate the gear back to relieve pressure and raise a tiny amount, it will then 'backtrack' onto the trace for about 2mm (X=8) before fully raising.
This is what we call the 'anti-stringing' distance, and it is a configurable parameter in the settings panel. The default for conductive ink is 2mm and the default for solder paste is 0.1mm. This parameter exists to encourage the 'stringing' in the ink to fall back onto itself and avoid shorting.
In traces shorter than 2 mm, the nozzle will actually backtrack twice when it reaches the starting point. So it looks like a pinball bouncing back and forth...

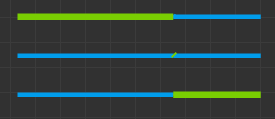
The picture above shows the 3 segments of the pad. It looks like the tiny pad is collapsing into a single diagonal line. It should be pretty trivial to get the software to discard lines these small.