6 / 20
Oct 2017

We received our voltera a couple weeks ago. While we are going through the tutorial, the nozzles for soldering paste were clogged. It was working at first, but after a few minutes the paste stopped coming out, and there is strong resistance when turning the gear manually. We tried to use new nozzles, and all of them ended up clogged by soldering paste. Is there any way to repair the clogged nozzles?

  • created

    Oct '17
  • last reply

    Jul '21
  • 19

    replies

  • 7.2k

    views

  • 9

    users

  • 7

    likes

  • 7

    links

Hi @owenqyzhang, welcome to the forums. Just to confirm, which nozzles are you using with the solder paste? We recommend using only the black 225um nozzles - the blue or orange nozzles are too small to print solder paste reliably.

The clogging could potentially happen due to a height problem - if the nozzle comes too close to the surface and the paste can’t flow out, this can lead to clogging. Height issues shouldn’t happen in typical operation, but can sometimes happen if:

  1. The silver z-limit switch (below the home position of the carriage) has ink or paste residue. This switch must be kept clean at all times, or height mapping will be incorrect.
  2. The dispenser or probe are removed or moved on the carriage without being prompted by the software. This will invalidate the height mapping, and could lead to broken nozzles.

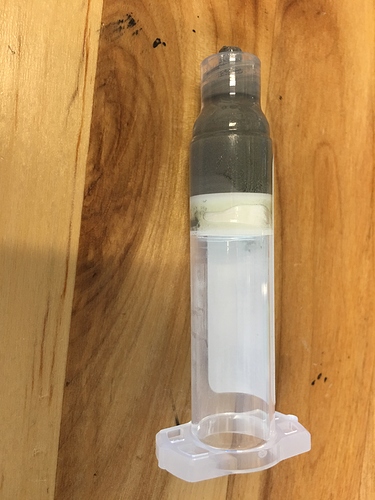
If it’s neither nozzle choice or height problems, it is possible that your solder paste cartridge has problems. Can you please remove your cartridge and take a picture, with the label facing away from the camera?

  • Matt

The nozzle is a luer lock which fits syringes. The color coding is just the color of the plastic part of the nozzle. Since you are using the original nozzles that came with the V-One, you are using the 225um nozzles recommended. Isopropyl alcohol may help act as a solvent. I haven’t tried it with the solder paste. I have tried it without success with the conductive where I had the same issue of clogging in the middle of a print.

I’ve just left my clogged Ink nozzle (original 225um) soaking in isopropyl alcohol for 24 hours.
Using a hand syringe and enough force that the alcohol/air pushes back past the plunger seal (in both directions) I can’t get anything through that nozzle!

I’ll leave it soak a bit longer, maybe a week or so, and try again. If anyone can suggest a better solvent (which won’t destroy the plastic components) or a better method, please post it here!

The advice given when trying to free the pistons on my old grey Fergy was “Let it soak for six months. If it still won’t move, leave it for another six months”. I’m afraid I don’t have that sort of patience, when it didn’t move after the first six months I ripped it apart and replaced both pistons and sleeves!

I’ve had decent success with acetone and an ultrasonic cleaner. @mharris reported here that he’s had good results with heavy duty flux remover, so that may be worth a shot as well!

One other option is syringe needle cleaning wire. Sometimes the smallest gauge steel string guitar strings are thin enough as well. The thinnest string in a 0.008 electric guitar string set would be thin enough for the 225um nozzle for example. Generally you want to feed the wire in from the tip, as most clogs occur at the constriction point in the nozzle.

I can confirm that acetone works well (much better than isopropyl alcohol) for the ink, and doesn’t seem to cause any damage to the plastic parts of the nozzle, or to the plastic container the nozzles are supplied in, which I used as a cleaning container. I 3D printed a holder for them on the way to setting up an agitator, but only got as far as shaking a couple of times a day and replacing the cloudy acetone twice.

The nozzle came out nice and clean, but didn’t survive my attempt to blow it dry, when somehow I bumped and bent the tip slightly. Of course it then broke off when I tried to straighten it. The remaining tip (without the long nose) seems much more robust, but there are probably jagged edges from the break which would stop it performing well…

Thanks for the advice! How long did it take to clean the nozzle? Did you use ultrasonic cleaner or just left it in acetone? I’m wondering if it can speed up the cleaning

I didn’t use the ultrasonic cleaner, just shook it occasionally and changed the acetone a couple of times.
I was planning to make up a little agitator to keep it moving around, but I had other things to do and it wasn’t a priority, perhaps next time. I think with some mild agitation an hour or so would have it cleaned up.
Maybe something like this, as I have a bunch of old DVD players around: http://www.instructables.com/id/Cheap-and-Easy-Lab-Agitator-Shaker-Great-for-PCBs-/36

3 years later

I’m having nozzles clog up basically overnight. I had 3 used nozzles , left in UScleaner for 30mins… left to soak overnight, UScleaner again for 30mins… I could see a hole, so looked clear… On the printer, nope, acting like its totally blocked… I tried all 3 same problem.

Thing is, I got a brand new nozzle, and it worked perfectly well… So I don’t get whats going on with these things…

When the paste is flowing, I actually refilled the paste cartridge 3 times, and all went perfectly… Go back next day, nope… won’t print…

Currently my only workaround is to lower the print speed to 100, and increase the kick to 0.60… Its not ideal by far, its taking a lot more pressure to get though the nozzle… but otherwise it looked clear after the US cleaner… I will have to try leaving it in for longer… Or maybe the temperature of the cleaner (60-70c) is curing the paste in the nozzle blocking it… Very annoying in any case as nozzles are not exactly cheap…

@Chris, are you purging enough paste? I was encountering clogging as well with the solder paste until I realized I needed to purge more, especially if I hadn’t used the solder paste for several days.

One trick I found helpful (with the disposable nozzles) is to set nozzle under my digital microscope while priming it, and letting it sit for a bit while V-One goes through its probing. Under the microscope (at about 10x?) you can see the solder (metal spheres) within the flux begin to flow. I’d put no more than a 1/4 turn to pressurize, then leave it be for a couple minutes, and check back (repeat if necessary) until I get a good flow, then back off the pressure.

Since I’ve started doing that, I’ve had great luck as dispensing paste. The following support topic on Purging solder paste5 may be helpful if you haven’t already reviewed it.

I let it do this…

It will print about 20-30 pads, then block up. even turning it by hand is near impossible to get the paste out afterwards. I change the nozzle, 20-30 pads later, blocks up again…

The same paste was used a week before for lots of boards… its not hot in the room or anything.

I’ve ordered some leaded paste as using lead-free currently… Though the lead free is the same composition as supplied with the printer, I actually printed that much with the current paste I refilled the cartridge 3 times! Then a week later, its like the paste has gone off… Even refilling again doesn’t help… Seems once I open a new tube of paste, I have to use it on “day 1” else game over… madness… So see how the leaded goes when it arrives.

Looking under a microscope, its like half the nozzle is blocked with solder which won’t come out. sometimes it causes the paste to come out at a angle! You would think purging would solve it, but doesn’t seem to help .

1 month later

Hi @Chris,

Sorry to hear you’re running into issues. I understand that it can be frustrating to deal with clogging, maybe I can help provide some insight - often times, the solder paste clogging is actually a symptom of incorrect print height rather than a paste issue. A few questions:

  • What is your print height setting when printing?
  • Which solder paste are you using?
  • Can you please send a picture of what the print looks like when clogging begins?

Our materials team was running into a similar issue recently with an R&D material, and after running through a series of experiments we found that the strongest predictor of clogging wasn’t material or age or even storage conditions - it was simply the height of the nozzle above the substrate.

The most important thing is to ensure that your height mapping is being done well - see the discussion on print height in my reply below.

If all else fails, increase your print height by around 0.04 mm and adjust your flowrate accordingly. If the nozzle has already clogged, this will not resolve the clog - but it is a very effective preventative measure. Good luck!

  • Matt

Hey @Chris,

One thing you said about jamming up seems odd to me - if you’re applying enough pressure to cause jamming, there’s already a problem. Having read through your link, a few notes:

  • From the topic you linked, I saw that you mentioned we supply a T3 paste - the standard is T4, which is within spec for the nozzle diameter we supply. If you were using a T3 paste, that would definitely be a challenge.
  • The Nordson-type straight-barrel nozzle is likely a significant contributor. With a straight-barrel nozzle, you are drastically increasing the amount of pressure you need to have anything flow through, and could lead to all kinds of other issues - even a smaller particle size (T5 vs. T4) wouldn’t work, just because of the additional friction.
  • The red pistons have a tighter fit than white. Not sure if that is contributing at all though.

I’d suggest going back to basics with a clear nozzle, standard T4 paste, and increasing your print height + ensuring your limit switch is clean. That said, if you’ve found a workaround that works for you and gets the job done, all power to you!

-Matt

I’m actually using T5 paste now… There was no change from using T3. I know the nozzle being longer will require more pressure, but that is not the problem anyway… I have gone through two packs of original nozzles so far as well. it is one reason I was looking for a alternative nozzle as it was starting to cost a lot to keep replacing them.

I did not know there was a difference between the red and white… But I think in all my previous tests I probably had randomly chosen one or the other anyway. I don’t think it would really make any difference. The problem is the metal plunger being tapered along with the red or white piston is just inherently going to have the metal plunger increase the diameter of the red or white piston. There is no way the smaller Voltera nozzles would work either. As they would require a little bit more pressure, and it would just jam up just the same as it is doing now anyway.

If you go back to my video I posted, the paste comes out incredibly easy initially… I really just turned the pressure down and wait for it to stop leaking, then when I start printing, after several pads it just simply stops dead, if I remove the cartridge and turn the gear manually even like 50 times, the paste just refuses to come out. With such an incredible amount of pressure on it there is just no way the nozzles can block up to that extent.

I had kept blaming the paste and the nozzles for the past few weeks… I have swapped and changed both of them for various brands of paste and nozzle sizes and there is just no way to print more than several pads before the whole thing Jams up again… Unless of course I use a lot wider diameter nozzle in which case it will continue printing fine.

But adding the nut in as on the forum link I posted has solved this problem. I printed a couple days ago and it was fine, I just left the cartridge in the printer for another couple of days, printed again, and it is still working fine. So just for whatever reason, the syringe pistons and the Voltera metal piston are just simply not a good match for each other.
Interesting thread. I have been attempting to print with absolutely no success with the flow being almost non-existent. Tried this nut method and have been printing well since. Has to be something in this theory.

1 month later

I noticed that none of my pastes would flow until I had thoroughly warmed them up. Have you folks been trying to use your pastes right out of the fridge?

I will definitely check out this plunger theory…

2 months later

It does not matter if they are directly out of the fridge or not…

“warming up” could simply be that is the time it takes for the piston to unstick.

I have not used the printer for a few weeks. I started this morning and ran into exactly the same problem. Where every board I was pasting I had to constantly adjust the kick and other parameters to get consistent results. Until I realised I had forgot to put the nut above the piston! which I did, and now the paste is flowing extremely well and consistent throughout several boards I just pasted.

I may design a 3-D object to adapt to the piston to the actual metal plunger properly… If I ever get chance… The quick fix of the nut does however work extremely well anyway.

To the topic of clogged nozzles, As long as I don’t use T4 paste in the grey nozzles, they don’t clog up. T5 works best. I can leave the printer “as is” for a couple weeks and the nozzle isn’t blocked afterwards.

Without the nut, as was repeatedly trying to clean out nozzles every PCB I printed. Even new nozzles “clogged” after a couple prints. Though it is actually a red herring in my case. As by the time I had finished messing about unclogging the nozzle, I think the piston just inherently became unstuck some hours later allowing me to print again another board, and then I would be back to “clogged nozzles” again. It was not actually anything to do with the nozzles at all. It just gave that appearance…